Composting is a basic homesteading skill that you can use to reduce waste within your household. This DIY Compost Bin makes it easy to get started!
You can compost food scraps, paper waste, cardboard, and other biodegradable items that you would typically throw in the trash can. After these items are fully composted, you can use the compost on your garden OR sell/give it to other gardeners.
Compost bins can be made with many different resources. One of my favorite large bin ideas is a pallet compost bin. *See my pallet bin in the photo below.
If you don’t have the space or the need for a large compost bin like this one, try making this DIY compost bin with a homestead essential–> a 5-gallon bucket.
DIY Compost Bin Using a 5 Gallon Bucket
**Video tutorial at the end
If you have a 5-gallon bucket lying around, then this compost bin will essentially cost you nothing. Even if you don’t already have a bucket, you can purchase one for a couple of dollars from a local farm or hardware store.
DIY Compost Bin Materials:
- One 5 Gallon Bucket with a tightly fitting lid… You can purchase these at your local farm store.
- Small sticks for drainage
- A Drill and a medium to large sized bit (or hammer and nail)
- Green Materials (Fruit & Veggie scraps, coffee grounds, egg shells, grass clippings, etc)
- Brown Materials (Shredded paper, cardboards, dead leaves, cow or horse manure, straw, mulch, etc)
- A trash can or a Kitchen Compost Pail (for collecting food scraps in the kitchen)
DIY Compost Bin: Step 1
You will want to start this project by drilling holes in the lower half of the bucket and the lid to allow the moisture to drain and evaporate out.
If too much moisture hangs out in your compost, it will mold and it won’t be the quality compost that you want on your garden.

I decided to drill 10 holes in the lid, 10 holes in the bottom, and 5 holes on each side. You can also make your holes with a hammer and nail if you prefer.
DIY Compost Bin: Step 2
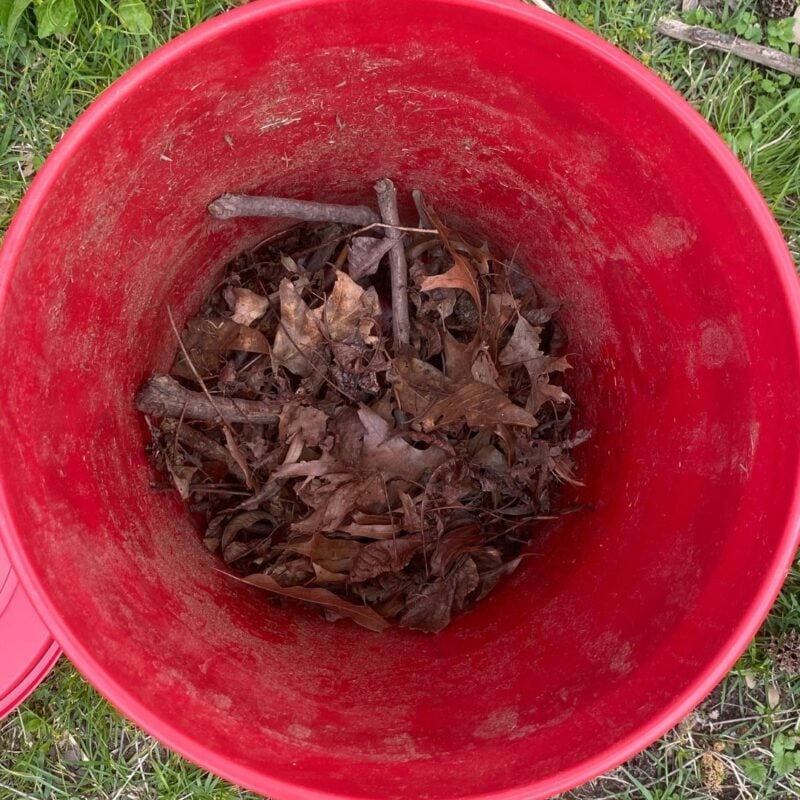
Place several sticks in the bottom of the bucket to help ensure that the bottom drainage holes don’t get clogged with your compost materials.
If you have extra brown materials (like dried leaves) you can add this on top of the sticks.
Make sure that the sticks are wedged in tightly or they will roll around with your compost and won’t help with drainage.
DIY Compost Bin: Step 3
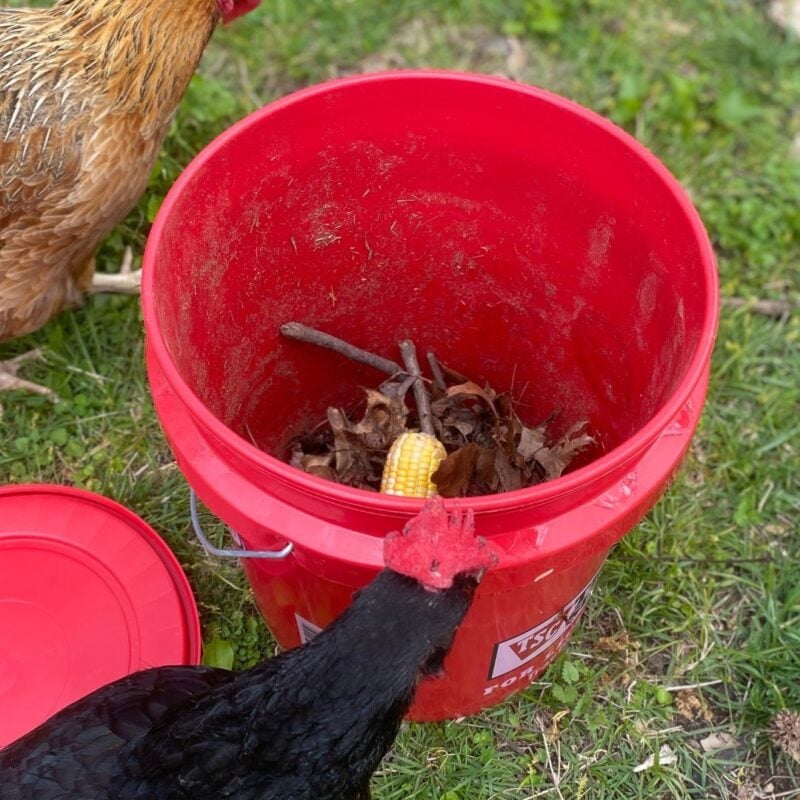
Now you can dump your scraps, papers, grass, egg shells, or whatever materials that you have saved for composting into the bucket.
Make sure that you don’t fill the bucket too full. Air needs to be able to move around the materials for them to properly decompose.
DIY Compost Bin: Step 4
Press the lid on tightly and roll the bucket on the ground.
You can enlist little hands for this job. The kids love rolling the compost bucket and being mama’s little helpers!
Roll or shake the bucket again each time you add to your compost pile.
This will help to evenly distribute the moisture, organic matter, and heat throughout the bucket to hasten the composting process.

DIY Compost Bin: Step 5
Use the small trash can or Kitchen Compost Pail to collect scraps in your kitchen until you are ready to move them outside.
You can place a trash can under your sink for scrap storage, but this will need to be emptied each day to avoid attracting bugs and growing mold.
If you have a Kitchen Compost Pail, you can keep it in the refrigerator. This method will keep the bugs and mold down so you can store up more before moving the scraps outside. I dump my kitchen compost pail once/week.

That’s It!
You now have your very own DIY Compost Bin made out of a 5 gallon bucket!
After about six weeks, the compost should shrink to about half the volume that it is now.

You can then collect the liquid (compost tea) from the compost to pour around plants or you can just mix all of the solid & liquid contents into the soil.
**Note: if you plan to collect the compost tea, you will need to add another bucket without holes under your bucket compost bin to catch the tea. You can read more about this below.
A Little Composting Tip…
It is best to try not to open the DIY compost bucket very often as opening the lid releases the heat.
Instead of adding scraps to your bucket daily, you can keep your kitchen scraps and coffee grounds a kitchen compost pail.
I use this Kitchen Compost Pail. It stays in my refrigerator to reduce the likelihood of molding and maggots (ick!).
What Items Can Be Composted?
Compost green & brown materials in your DIY Compost Bin. Green materials, like kitchen scraps, are high in nitrogen. Brown materials, like dried leaves and sticks, are carbon-rich.
You want a Carbon: Nitrogen ratio of about 30:1. Since each ingredient will have different carbon & nitrogen levels, it is helpful to refer to a chart (like this one) before adding to your compost pile.
Green Composting Materials
- Grass clippings
- Fruit & Veggie Scraps
- Egg Shells
- Coffee or Tea Grounds
Brown Composting Materials
- Shredded Paper
- Cardboard
- Brown Leaves
- Cow Manure
- Mulch
- Straw
Grab my Composting Made Easy E-Book to help you set up your compost system!

AVOID COMPOSTING THESE ITEMS:
These materials should not be added to your DIY Compost Bin or any other composting container.
Pet waste
Waste from these animals (especially meat-eating animals like dogs & cats) can contain parasites and other microorganisms that you don’t want in your garden.
Charcoal
The sulfur content in charcoal & ashes will make your compost very acidic. If you add highly acidic compost to your garden, you could kill your plants before they even have a chance to grow.
Fats & oils
Fats and oils can add too much moisture to your compost pile.
Meat & Bones
You can add meat to your compost pile, but decomposing meat smells very strongly and can attract rodents and other scavengers to your compost pile.
Therefore, you should find another use for leftover meat and bones like dog food or bone broth.
Onions & Citrus Peels
The acidity in these onion and citrus scraps can kill worms and other microorganisms that work to break your compost down.
Dairy
Dairy is another one that can be composted, but it increases the risk of scavengers visiting your pile so it is better to avoid this one.
Manure from horses & pigs
This one is debatable as many people and businesses use manure from horses and pigs in their compost.
I choose not to use them in my DIY compost bin or my pallet compost bin simply because I have found intact weed seeds in horse manure.
The composting process could kill these seeds, but the risk isn’t worth it to me.
Our pigs eat meat so I want to avoid the parasite risk from their manure.
Unhealthy Plants
If you compost plants that were diseased, then you risk transferring the disease to new plants in your garden when you lay the compost down.
Coffee or Tea Bags
You can compost loose-leaf tea, coffee beans, and coffee grounds, but don’t toss in any tea or coffee bags.
The bags may not decompose well and they could release chemicals as they do start to break down.
Collecting Compost Tea from the DIY Compost Bucket
You can collect compost tea (essentially liquid fertilizer) from this compost bucket in addition to the solid compost. There are two ways to do this.
Option 1:
Place the completed compost bucket with holes in the bottom into another bucket.
Make sure that the compost bucket doesn’t go farther than halfway down the bottom bucket (this is to make sure that the drainage holes aren’t sitting in the tea).
Liquid will collect in the bottom bucket as the scraps decompose and rain trickles through the compost. After the compost has drained, simply collect the tea from the bottom bucket.
Here is some black gold from my worm compost bin:

Option 2:
After the scraps are completely composted, move the compost to another container with no holes.
Cover the compost with water and allow it to sit and steep for 3 days. Then, you can strain the compost out and collect the compost tea that is leftover.
Do you have extra 5 Gallon Buckets lying around?
Check out the bucket projects in this post for easy and practical ways to put them to use!
Happy Composting, y’all!
>>More Gardening And Composting Resources
- How to Build a Simple Pallet Compost Bin for FREE
- 30 Spring Garden Planning Resources
- 15 Beginner Gardening Tips
- DIY Repurposed Planting Containers
- How to Compost Guide for Beginners
Pin “DIY Compost Bin with a 5 Gallon Bucket” for later!


Is this design still working for you? I’ve been working on compost with a similar design but I keep getting TONS of maggots. I wouldn’t mind since they help with the decomposition process, but I live in a small apartment and I don’t want tons of flies outside my front door. How are you keeping maggots out? I tried a bug screen but for some reason that’s not doing the trick.
I haven’t tried to keep the bugs out because they help move the composting process along and I keep this bucket outside… I would think that adding a fine mesh over each area where you have drilled holes would keep them out. Here is a link to a thread that might help out… https://www.helpfulgardener.com/forum/viewtopic.php?t=18586
:):)
Excellent. Absolutely loved reading and very helpful at the same time 🙂
Composting is a great method to use the things in your refrigerator that you didn’t get to, therefore eliminating waste. Keep a container in your kitchen, for example, a tin bucket or vessel, to accumulate your composting materials. On the off chance that you don’t want to get one, you can make your own indoor or outdoor custom made compost bin.
Thank you for the article. I have 2 questions. What do you do with your compost pail in the winter? Are you still using the original 5 gallon pail? How has it held up? Thanks.
You can continue to use this compost pail through the winter, you will just need to be sure to roll it often and keep it in a sunnier part of your yard. I have actually started composting more than the bucket could keep up with so I have transitioned to a large DIY compost bin. I plan to put up a tutorial for that soon.
And what do you do with the trash can? I think I know but you never mentioned it or added that step but included it in the list of things you will need.
Oh! Good catch! I’ll go back and add that in… I kept this trash can under my sink to toss my kitchen scraps in until I could take them outside to the bucket.
Do you wedge the sticks hard down into the bottom? I am curious if they just get mixed around when the bucket is rolled or shook. Thank you!!
You do need to wedge them in. I’ll add that point to the post! Thanks!
How do you collect the “compost tea”?
If you drill holes in the lid, rain gets in. Is that Ok?
It has worked fine for me. My large compost bin is completely open on the top. To collect the tea, you will need to transfer finished compost to a bucket with no drainage holes. Cover the compost with water and let it sit for 3 days, then strain it. 🙂
I have the compost bucket with holes in another 5gal bucket. I take the top one out and there is liquid compost (tea)in the bottom bin. I add that to water and use the tea to water my garden. I hope this is ok.
That sounds great!
How many times can you fill the 5 gallon bucket with weekly scraps before letting it compost?
I just continue adding scraps until it is almost full. Leave a little headspace for airflow, though.